Creating 2D Games with Python A Fun Coding Journey for Kids
Creating 2D Games with Python: A Fun Coding Journey for Kids
What if your child could build their own video game instead of just playing one? Most kids love games. They talk about scores, levels, sound effects, and cool characters. But imagine the shift when they say, “I built this game myself.” That is where 2D Python game development becomes powerful. It turns screen time into skill time.
A 2D game uses flat graphics, like classic arcade titles. Kids control objects, move a ball, track scoring, and add sound effects. Python makes this process smooth because the code looks like English. At Codeyoung, live 1:1 classes have helped 50,000+ kids since 2019 begin their game development journey with structured guidance. Many of those students start with small python game projects before moving to advanced features.
This guide explains tools, libraries, game logic, and a step by step explanation for building your first 2D game.
Key Takeaways
2D Python game development teaches game logic, movement, collision detection, and object oriented programming in a practical way.
Libraries like pygame library and arcade library simplify graphics, sound, and event handling.
Every python game runs on a game loop inside a game engine structure.
Installing tools like pygame through the command line makes setup easy on any operating system.
Why Python is Perfect for 2D Game Development
Python is ideal for 2D Python game development because Python is simple, readable, and beginner friendly. A student can understand a Python program faster than most programming languages.
Python reduces confusion. A programmer writes a function and runs the program. They then see the graphics appear in the game window right away. That immediate feedback builds confidence.
Python also supports object-oriented programming(OOP). OOP allows students to create classes and objects. A class defines properties like position and speed. An instance of that class becomes the moving ball or player on the screen. Inside methods, students use self to refer to the current object. For example, if self.position goes beyond width, the object changes direction.
Python has massive community support. Colleges such as Simpson College teach Introduction to Computer Science and Programming in Python at MIT in their computer science courses. Tutorials, examples, and ready-made libraries are widely available. Many resources and teachers are available to explain each step of the process, helping students understand complex concepts easily.
At Codeyoung, teachers see that students who start with 2D games in Python learn logic quicker than those who only focus on theory. Game development makes abstract ideas visible. When a key press triggers movement, the concept of events becomes real.

Getting Started with 2D Python Game Development
Get started by: (1) installing Python on your computer, (2) choosing beginner-friendly editor like IDLE or VS Code, and (3) understanding core concepts like variables for position/speed, loops for continuous action, and functions for organization—then build a simple bouncing ball to learn game loop fundamentals.
To start 2D Python game development, follow these three steps:
Install Python on your computer.
Choose an editor that suits your needs.
Understand the basic game logic to build your game.
Note: When choosing an editor, make sure it supports Python and is easy for you to use VS Code and IDLE are both popular options for beginners.
First, install Python based on your operating system(OS). After installation, open the command line and confirm Python works.
Second, choose a coding environment. Beginners can use IDLE. Many prefer Visual Studio Code for better features. Some use browser-based platforms to avoid setup issues.
Third, understand the core programming ideas before building a 2D game:
Variables store position, speed, and point values.
Loops repeat actions continuously.
Conditions control game state changes.
Functions like def main and def update organize the program.
Game logic controls how the game behaves. Game logic decides how movement works, how scoring increases, and when to detect collisions.
Every 2D game also uses coordinates. The x value controls horizontal movement. The y value controls vertical movement. When the ball moves forward, the x position increases. When the ball moves up, the y value changes.
Students should begin small. A bouncing ball project teaches loop, movement, and collision detection without complexity.
Setting Up the Environment
Start by making sure Python is installed on your operating system. You can check using terminal(for windows OS) by typing:
python --versionIf the command shows a version number, Python is ready. If not, download it from the official website and complete the installation.
Once Python is ready, the next step is to add the Arcade library, a powerful python library designed for 2D game development. Open your command line or terminal and type:
pip install arcadeThis command will download and install the Arcade library, giving you access to all the tools you need to create graphics, handle events, and build your game window.
For even smoother game development, consider setting up a virtual environment for your project. A virtual environment keeps your game’s dependencies separate from other Python projects, ensuring that your 2D game runs the same way on any computer. You can create one by running:
python -m venv my_game_envThen, activate your virtual environment and install the Arcade library inside it. This step is especially helpful if you plan to share your project or work on different machines.
With Python, the Arcade library, and your virtual environment set up, you’re ready to start building your own 2D game. This foundation keeps your project organized and easy to manage. So, you can move forward smoothly in your game development journey.
Essential Python Libraries for Creating 2D Games
The three best libraries for 2D Python game development are pygame library, arcade library, and turtle library. Each python library serves a different level of learner. These libraries help you get things done. They handle graphics, user input, and other key features. This makes building your 2D games easier and faster.
Pygame
The pygame library is a popular python library for 2D Python game development. Install pygame by typing pip install pygame in the command line.
Pygame manages:
Game window display
Keyboard input events
Sprites and graphics
Sound effects and play sounds function
Methods such as update and event handlers are called automatically during the game loop or in response to user actions
Many beginners choose pygame because of strong community support and countless example projects.
Arcade
The arcade library is a modern framework built for 2D game creation. Start by writing import arcade at the top of your script.
Arcade offers:
Clean structure
Built-in collision detection
Smooth graphics rendering
Organized game state control
Many educators prefer arcade because the structure encourages better object oriented programming habits
Turtle
The turtle library is built into Python and is ideal for absolute beginners. Turtle allows students to draw graphics using simple movement commands.
Turtle teaches:
Movement using forward and backward commands
Angle control
Basic screen drawing
Coordinate understanding
Turtle does not function as a full game engine. Turtle helps younger children understand motion and logic before moving to pygame or arcade. Many students start with Turtle projects and then transition into full 2D Python game development.
Each library supports game development differently. Choose the right python library depending on the child’s age and experience.
Understanding Game Engine and Game Loop
Every game engine runs on a game loop. The game loop repeatedly updates and draws the game until the window closes.
The game loop performs three main tasks:
Check events such as key presses.
Update object position using def update methods.
Draw graphics on the screen.
Without a loop, movement stops. The loop keeps the program alive. Game state defines the current mode of the game. Game state can represent menu, playing, paused, or game over. Proper game state control prevents bugs.
Collision detection checks whether two objects overlap. When two sprites touch, detect collisions logic triggers scoring or sound effects.
Students often write code such as:
if self.x > width
reverse speed
add point
Game development becomes clearer when children understand how logic flows inside the loop.
Building Your First 2D Game with Python: Step-by-Step Guide
Build your first Python game through six steps: create game window (800x600 pixels), define Ball class with position/speed properties, add movement in game loop updating x/y values, implement collision detection at boundaries, add scoring and sound effects, then run continuous game loop—this bouncing ball project teaches fundamentals in 1-2 hours.
A simple bouncing ball project is the best starting point for 2D Python game development. This small 2d game teaches game logic, movement, collision detection, and how a game loop works inside a game engine.
Step 1: Create the game window
Every game needs a game window. The game window is the area where graphics display on the screen.
If you use the pygame library, first run pip install pygame in the command line. Then initialize pygame inside your script. If you use the arcade library, begin with import arcade.
Define the width and height of the window. For example, 800 by 600 pixels. This range controls how far the ball can move. Without a defined window, the program has no visible output.
The window is the foundation of your game development project.
Step 2: Create a ball class using Object Oriented Programming
Now create the moving object. In object oriented programming, you define a class called Ball. A class acts like a blueprint.
Inside the Ball class, define:
position (x and y values)
speed (how fast the ball moves)
Create an instance of Ball inside def main. That instance becomes the actual object drawn on the screen.
Use self.position and self.speed inside methods. When beginners understand how self works, they understand how objects manage their own data. This concept is important in all programming languages.
Step 3: Add movement logic
Movement happens inside the game loop. The game loop runs continuously and calls def update to refresh object position.
Inside def update, increase the x position by speed. For example:
move forward by adding speed
move down by reducing y
Movement only works if the loop updates values every frame. That constant update makes the ball appear smooth on the screen. This step builds strong game logic skills.
Step 4: Implement collision detection
Collision detection keeps objects inside the game window and allows sprites to interact.
Write conditions such as:
if self.x >= width
reverse speed
adjust position
Collision detection logic allows the program to detect collisions between objects or boundaries. In larger game development projects, collision detection also manages interactions between sprites.
This concept is used in arcade-style games, snake game projects, and platform runners.
Step 5: Add scoring and sound effects
A complete python game needs feedback. Add scoring by increasing a point variable when the ball hits a boundary.
Display scoring on the screen using draw functions. To improve user experience, add sound effects. Use play sounds functions in pygame or arcade to play a sound when collision detection triggers.
Sound, scoring, and graphics together make the game feel interactive and fun.
Step 6: Run the game loop
The game loop connects everything together.
Inside the loop:
check events such as key presses
update position
draw graphics
refresh the display
Without the loop, the game stops. The loop keeps the game alive until the player closes the window. Understanding the game loop prepares any young programmer for future game engine work.
2D Python game development becomes easier when students follow a structured progression. Each project builds stronger game logic, better collision detection, and deeper understanding of how a game loop works inside a game engine. The table below shows how a beginner can move from a simple bouncing ball project to more advanced 2D game development step by step.
This structured path helps young programmers improve collision detection, game state control, and object-oriented programming step by step through progressive hands-on projects.
Deploying the Game
Once you finish building your Python game with the Arcade library, the next fun step is deploying it for others to play. Game deployment means making your game available beyond your computer. This can be done through a downloadable file or online access.
One popular way to share your game is by creating an executable file. Tools like PyInstaller can turn your Python script into one file. It includes the Arcade library and all other dependencies. You can run this executable file on any compatible computer. It works even if Python or the Arcade library isn’t installed.
If you want to reach a wider audience, consider uploading your game to a cloud platform like itch.io.This platform helps indie game developers host their games online. Players can download or play your Python game right in their web browsers. This is a great way to showcase your project and get feedback from other gamers.
Deploying your game is a rewarding part of development. You can create an executable file or host it online. Either choice is fulfilling. You can share your creativity, get feedback, and inspire others. This helps them start their own journey with the Arcade library and Python.
Advanced Topics
Once you know the basics of 2D game development with the Arcade library, you can move on to advanced topics. This helps you make your games more dynamic and engaging.
One key area is building complex game logic. Use object oriented programming to organize your code into classes and methods. This structure makes it easier to manage scoring, power-ups, and different game states. Create a Player class that handles its own movement and collision detection. You can also use inheritance to build different enemy types.
Sprite animation adds life to your 2D game. The Arcade library allows you to animate sprites with simple functions. You can cycle through images to create smooth movement and special effects. This makes your characters and backgrounds look more realistic
User input keeps your game interactive. The Arcade library provides event functions to detect keyboard and mouse actions. Your code can respond right away. Move a ball with arrow keys or play sound effects with a mouse click. These features make your game window responsive and fun to use.
When you work on advanced features, build your game step by step. Test your code often. Use print statements to find and fix errors. Each new feature builds your confidence and improves your programming skills. These skills will aid you in future Python game projects. They’re useful for both simple examples and larger 2D games.
Popular 2D Games Created with Python
Many real 2D game projects use Python. Indie developers build arcade shooters, puzzle games, and retro platformers using pygame and arcade.
Python may not compete with large commercial 3D engines, but Python excels in learning environments and early-stage development.
Many professional programmers began with a simple python game script. The early experience built strong logic skills. Students who practice 2D games with Python often move forward into advanced game engine platforms later. The foundation remains the same: loop, logic, events, movement, collision detection.
Game development builds transferable skills. Problem solving improves. Logical thinking sharpens. Confidence grows.
Tips for Young Developers Creating 2D Games in Python
The best way to improve at creating 2D games in Python is to keep things simple and practice often.
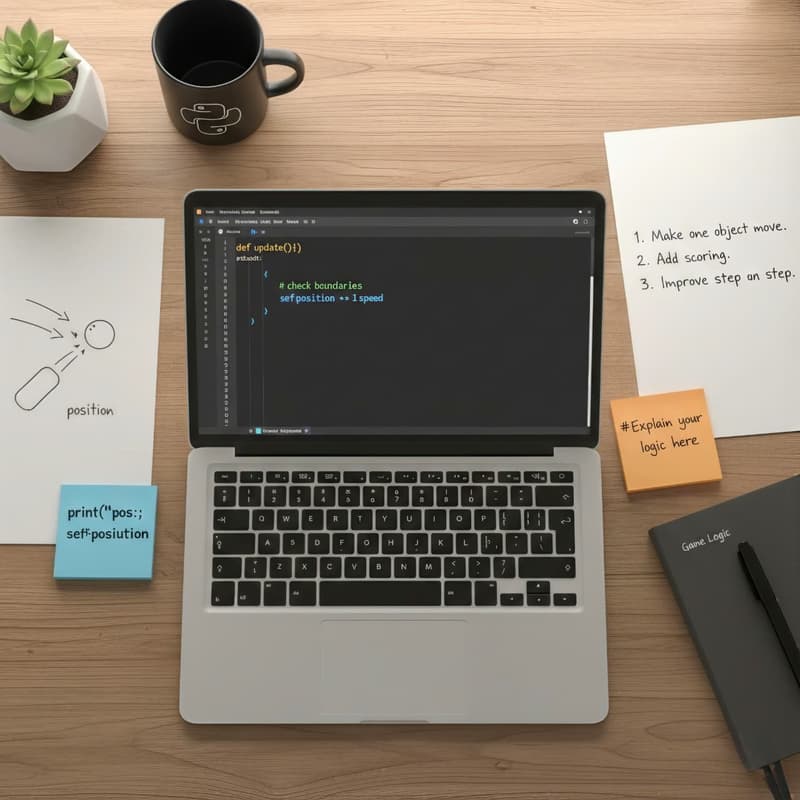
Start with a small 2d game. Make one object move. Add scoring. Then improve step by step.
Do not rush into complex features. Strong game logic matters more than fancy graphics. When something breaks, debug slowly. Check one line at a time. Use print to see values like position or speed. That habit builds real problem-solving skills.
Write comments in your code. Comments help you remember why you wrote a function or changed a method. Clear notes make fixing bugs easier later.
Practice regularly. Even 20 minutes a day helps. Small progress adds up.
Try remixing tutorials. Change the ball speed, add new sprites, adjust sound effects. Experimenting builds creativity. Persistence builds confidence.
Common 2D Python Game Development Mistakes and How to Fix Them
Common mistakes include: broken game loops (fix: ensure continuous running and update before drawing), weak collision detection (fix: use clear if statements checking position boundaries), confused game state (fix: define menu/playing/game-over states clearly), premature complexity (fix: master movement/scoring/events before adding features), and skipping debugging (fix: use print statements tracking position/speed values step-by-step). Most beginners struggle with game loop structure, collision detection logic, and game state control. Understanding these issues early improves learning speed.
Not understanding the game loop
The game loop controls movement and display. Without a proper loop, objects will not update correctly. Fix this issue by ensuring the loop runs continuously and updates position before drawing graphics.
Poor collision detection logic
Collision detection fails when conditions are unclear. Always check position boundaries carefully. Use clear if statements and test values using print statements.
Weak game state management
Game state confusion causes unexpected behavior. Define clear states such as menu, playing, and game over. Switch states using simple conditions.
Adding too many features too early
Many beginners add complex features before mastering basics. Focus on movement, scoring, and events first. Then expand features gradually.
Ignoring bebugging
Debugging helps fix errors quickly. Use print statements to track position, speed, and range values. Debug step by step instead of guessing.
Conclusion
2D Python game development gives kids a practical and exciting entry into programming. Python simplifies coding. Libraries like pygame library and arcade library handle graphics and sound. A structured game loop keeps everything running smoothly.
Children learn object oriented programming, collision detection, and game state management through hands-on projects. Small projects build strong foundations.Game development builds transferable skills in computational thinking, problem solving, and logical reasoning, as described in the K–12 Computer Science Framework.
Every programmer starts with a first script. A python game is a powerful place to begin.
Creating 2D Games with Python - FAQs
What makes Python ideal for 2D game development for kids?
Python is ideal for 2D Python game development because Python uses simple syntax and clear structure. Kids can write a short line of code and quickly see graphics appear in a game window. The fast feedback from the game loop helps them understand game logic easily.
Python has a great learning ecosystem. You can find online tutorials and structured courses. Many schools, like Simpson College, teach Python as a core programming language.
Which Python libraries are best for creating 2D games?
The best python library options for a 2D game are pygame library, arcade library, and turtle. Pygame works well when students want full control over collision detection, sound effects, and game state after running pip install pygame in the command line.
The arcade library is a modern framework where students start with import arcade and use built-in sprites and methods. Turtle suits beginners who want simple movement and graphics before moving to a full game engine.
Can beginners start creating 2D games with Python?
Yes, beginners can start creating 2D games in Python with small projects and clear guidance. Start with a simple python game like a moving ball and learn how the game loop and game logic work step by step.
Focus on core ideas such as position, movement, and collision detection before adding complex features. Use tutorials, test code with print statements, and fix errors calmly to build strong programming habits.
What are some example projects for 2D Python game development?
Popular example projects in 2D Python game development include a Pong clone, Snake game, maze game, and simple platform runner. Each project teaches object oriented programming, def main structure, and def update methods inside the game loop.
A Snake game improves collision detection and scoring logic, while a maze game strengthens movement and game state control. These small projects help any beginner programmer build confidence for future game development work.
How long does it take to create a simple 2D game with Python?
A beginner can build a basic python game in a few weeks with consistent practice. Simple projects such as a bouncing ball or scoring game require understanding of movement, collision detection, and game loop logic. Structured guidance speeds up progress significantly.
Comments
Your comment has been submitted