
Key Takeaways
- A maze game serves as an excellent first Scratch coding project for beginners, offering a clear goal and immediate sense of accomplishment.
- Scratch project ideas can be categorized by type, including games, animations, and art, allowing kids to explore various creative avenues.
- Selecting the right Scratch project involves considering your child's interests and skill level, then breaking down the idea into manageable, step-by-step tasks.
- Sustaining a child's engagement with their Scratch project requires structured guidance, celebrating small achievements, and fostering a sense of ownership to prevent abandonment.
What are some fun scratch coding project ideas for beginners?
Fun Scratch coding project ideas for beginners often involve creating interactive games like a maze, building short animations, or designing a digital art tool. These projects leverage Scratch's visual, block-based system, allowing kids to immediately see results and learn core concepts like events, loops, and conditionals without complex syntax.
A maze game is a fantastic starting point for any child new to coding. The concept is instantly understandable: move a character from a start point to a finish line without touching the walls. This simple goal provides a clear structure for a first project. Using the drag-and-drop interface, a beginner can quickly build a playable game, which provides a powerful sense of accomplishment. This process is detailed in our Scratch programming for kids: The Complete Beginner's Guide, which covers these foundational steps.
The Scratch platform itself is a rich source of inspiration, offering a vast online community and a gallery of projects that showcase the diverse creations possible even for absolute beginners. Seeing what other kids have built can spark ideas and provide a tangible sense of what is achievable. This peer-to-peer sharing helps transform coding from a solitary activity into a collaborative and creative one.
- Create an Interactive Birthday Card: This project teaches sequencing and event handling. A child can program characters to dance or sing when the recipient clicks on them, making it a personal and shareable creation.
- Animate Your Name: By making the letters of their name spin, change color, or bounce around the screen, kids learn about loops and motion blocks in a simple, engaging context.
- Build a "Clicker" Game: The objective is to click a sprite as many times as possible within a time limit. This introduces the concept of variables for tracking a score and timers for creating a game loop.
- Tell a Two-Character Joke: This project focuses on dialogue and timing. Using "say" and "wait" blocks, students can program a short, animated conversation, learning how to coordinate actions between multiple sprites.
| Project idea | What your child builds | Why it's a great first project |
|---|---|---|
| Maze game | Character moves from start to finish without touching walls. | Provides a clear goal; offers a quick sense of accomplishment. |
| Interactive Birthday Card | Program characters to dance or sing when clicked. | Teaches sequencing, event handling; personal and shareable. |
| Animate Your Name | Letters spin, change color, or bounce around the screen. | Learn about loops and motion blocks in a simple context. |
| "Clicker" Game | Click a sprite many times within a set time limit. | Introduces variables for score tracking and timers. |
| Tell a Two-Character Joke | A short, animated conversation between two sprites. | Focuses on dialogue, timing, and coordinating actions. |
What are some Scratch project ideas categorized by type, such as games, animations, and art?
Project-based learning is a cornerstone of effective computer science education for K-12 students. As Code.org emphasizes, creative computing allows students to express themselves through different media. Scratch excels here by enabling a wide variety of project types that cater to different interests, from logical game design to expressive storytelling and visual art. Each type introduces fundamental coding concepts in a context that resonates with the creator.
Categorizing projects helps focus a child's learning goals. A student who loves video games can start by building simple interactive experiences, while a natural storyteller might prefer creating an animated short. By choosing a project type that aligns with their passions, kids are more likely to stay engaged and absorb the underlying programming logic. Many of the 7 best Scratch games for beginners can be remade to teach these core concepts.
| Project Category | Example Projects | Core Concepts Introduced |
|---|---|---|
| Interactive Games | Pong, Maze Runner, Clicker Game | Variables (for score), Conditionals (if-then), Events (when key pressed), Collision Detection |
| Engaging Animations | Tell a Joke, Dance Party, Animated E-Card | Sequencing, Loops (repeat), Looks Blocks (costume changes), Timing (wait blocks) |
| Creative Art | Drawing Tool, Pattern Generator, Photo Booth | Pen Extension (for drawing), User Input (mouse x/y), Loops (for patterns), Operators (for random colors) |
This structure allows a young learner to focus on one area or move between them, building a versatile skill set. A game might need a short animation for its intro, and an art project could be turned into a game. This interdisciplinary nature shows how different coding skills can be combined to create more complex and interesting projects over time.
Different children thrive with different project types based on their learning style and personality. A highly social child might love creating interactive stories or multiplayer game concepts they can share and play with friends, while a more introspective, self-directed learner may prefer the quiet focus of building a complex animation or generative art piece. If your family is working with a tight budget and limited time, game projects often deliver the most immediate engagement and replayability, making them feel like the "best value" for your investment. However, if your priority is fostering creative expression and artistic confidence, animation and art projects provide deeper opportunities for self-expression, even if they take longer to feel "finished." A balanced recommendation is to let your child try one project from each category over their first month of learning, then follow the path that generates the most excitement and voluntary practice time.
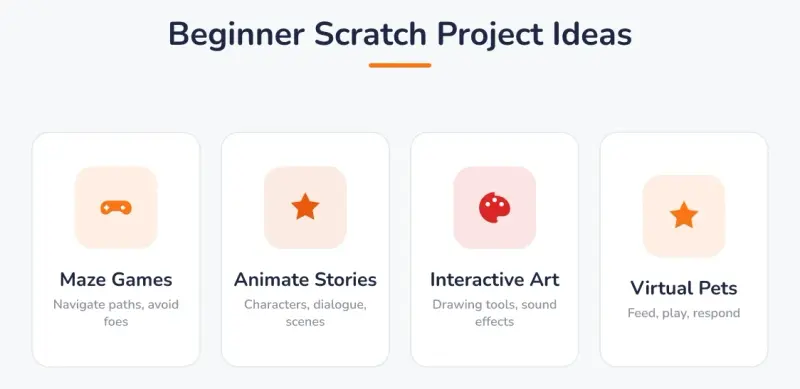 Beginner Scratch Project Ideas: Maze Games (Navigate paths, avoid foes), Animate Stories (Characters, dialogue, scenes), Interactive Art (Drawing tools, sound effects), Virtual Pets (Feed, play, respond).
How do you choose a Scratch project that fits your kid?
Selecting the right first project is critical for building a child's confidence and sustained interest in coding. The ideal project should align with the child's existing passions, whether they love superheroes, animals, music, or space exploration. By connecting coding to something they already enjoy, the process feels less like a lesson and more like a new way to play and create.
Parents can guide this choice by observing what their child is naturally drawn to. A kid who spends hours building with LEGOs might enjoy a project that involves constructing a scene or a simple city. A child who loves drawing could start with a project using the Pen tool to create a digital spirograph. You can explore more ideas tailored to specific ages in this guide to Scratch projects for different age groups. Involving your child in the decision-making process is key; when they have ownership of the idea, their motivation to see it through increases dramatically.
The project's complexity should also match the child's age and attention span. A six-year-old may have a great time making a cat sprite meow and move when clicked, while a ten-year-old might be ready for the logic of a multi-level maze game. Starting too complex can lead to frustration and abandonment.
- Start with a "Remix." Find a simple, existing project on the Scratch website and challenge your child to change one thing. They could change a character's color, alter its speed, or add a new sound effect. This lowers the barrier to entry and teaches them to read and understand existing code.
- Follow a One-Page Guide. Look for a simple tutorial that fits on a single page or has just a few steps. Completing a project in one sitting provides a quick win and builds momentum for the next, more challenging task.
- Focus on a Single Concept. Instead of trying to build a complex game, choose a project that teaches one core idea well. For example, a "Pong" clone is excellent for understanding conditionals and collision, while an animated story is perfect for mastering sequencing and timing.
- Connect to a School Subject. If your child is learning about the solar system, suggest a project where they animate the planets orbiting the sun. If they are studying a historical event, they could create a short, interactive story about it.
Some parents worry that letting their child choose a project based purely on interest might lead to something too ambitious or too simple for their actual skill level. This is a valid concern, but the solution lies in collaborative scoping rather than parent-directed selection. Start by honoring your child's excitement about their idea, then work together to identify a "version 1.0" that is achievable in a reasonable timeframe. For example, if your child wants to build a complex role-playing game, help them see that a single battle scene or character creator could be a perfect first step. Codeyoung has taught 50,000+ children across 15+ countries, and we have seen time and again that projects born from genuine interest, even when scaled down, produce far better learning outcomes than parent-selected "educational" projects that fail to spark joy.
How do you turn a Scratch project idea into a finished build?
The following steps provide a clear walkthrough of how to make a "Catch the Falling Object" game in Scratch, a classic first project that covers all the essential concepts. The idea is simple: a basket or character sits at the bottom of the screen, the player slides it left and right with the arrow keys, and the goal is to catch items as they fall from the top while the score climbs with every catch. Effective tutorials break a build like this into manageable parts, from moving the catcher to keeping score, guiding beginners through each stage of creation. If you would rather build a maze first, our detailed guide on How to Make a Maze Game in Scratch (Step by Step) offers a similar structured approach.
Step 1: Set the Stage and Add Your Two Sprites
First, set up the players in your game. You need two sprites: a catcher that stays at the bottom and an object that falls from the top. Use the default cat sprite as your catcher, or click the "Choose a Sprite" button to pick something like a bowl or a basket. Then add a second sprite for the falling item, such as an apple, a star, or a ball.
Select your catcher sprite and look at the properties below the stage. Setting the Size property to a smaller number, like 50, keeps it from filling the screen, and dragging it to the bottom of the stage shows the player where it lives. You can leave the default backdrop or pick a simple one from the "Backdrops" tab so the falling object stands out.
Success in this step means you have two sprites on the stage: a catcher resting near the bottom and an item ready to fall from the top.
Step 2: Move the Catcher with the Arrow Keys
To make the game interactive, the catcher needs to slide left and right when the player presses the arrow keys. Select your catcher sprite and go to the "Code" tab. You will build two small scripts, one for each arrow key.
Start with an event block: drag a when [right arrow] key pressed block from the "Events" category into the scripting area. Then, go to the "Motion" category and attach a change x by [10] block. This moves the catcher to the right. Create a second script for the other direction: when [left arrow] key pressed should use change x by [-10] to slide the catcher left.
Test your code by clicking the green flag and pressing the left and right arrow keys. The catcher should glide across the bottom of the stage. It only needs to move sideways, so there is no need for up and down scripts here.
Step 3: Make the Object Fall from the Top
Now bring the falling item to life. Select your object sprite and start a new script with the when green flag clicked event block. Add a forever loop from the "Control" category so the item keeps falling again and again.
Inside the loop, first send the object to a random spot at the top of the screen. Use a go to x: [ ] y: [180] motion block, and for the x value drop in a pick random [-200] to [200] block from the "Operators" category so it appears in a different place each time. Then add a repeat until block that checks touching [edge]? from the "Sensing" category, and inside it place a change y by [-5] block. This makes the object slide steadily downward until it reaches the bottom edge, where the loop sends it back to the top to fall again.
Click the green flag to test. The object should drop from a random spot at the top, fall to the bottom, and reappear up top to fall once more.
Step 4: Catch the Object and Keep Score
A catcher game needs a way to track success, so now you will add a score. Click "Make a Variable" in the "Variables" category and name it "Score." A box showing the score will appear on the stage.
Go back to your falling object sprite. At the very start of its script, before the forever loop, add a set [Score] to [0] block so the score resets each time the game begins. Then, inside the falling loop, add an if... then block from the "Control" category with a touching [catcher]? condition from the "Sensing" category. Inside that if block, add a change [Score] by [1] block so the score climbs on every catch, and a go to x: [ ] y: [180] block (with the same random x) so the caught item jumps back to the top right away.
Run the game and slide the catcher under the falling object. Each time you catch it, the score on the stage should go up by one. This catch-and-score loop is the heart of your game.
Step 5: Add a Starting Setup and Rules
Finally, make the game start cleanly every time. You will add a few finishing touches to the scripts you have built.
On the catcher sprite, add a when green flag clicked block with a go to x: [0] y: [-150] motion block so the catcher always begins centered near the bottom. You can also add a say [Catch the falling apples!] for 2 seconds block from the "Looks" category to tell the player what to do.
For a clear goal, you might decide the game ends when the player reaches a target score. To do this, add an if [Score] = [10] then check inside the object's loop with a say [You Win!] for 2 seconds block and a stop [all] block from the "Control" category. Once this is done, your catcher game is complete. Every time a player clicks the green flag, the score resets, the catcher returns to its starting spot, and the game is ready to play again.
With these steps completed, you have a fully functional game. From here, you can add more features like a timer, falling items that must be dodged, sound effects when an object is caught, or speeding up the drop as the score rises.
What Scratch projects should beginners try after the first one?
After completing a first project like a maze game, a young coder has a grasp of fundamental concepts like movement, events, and conditionals. The next projects should build upon these skills by introducing one or two new ideas, gradually increasing complexity without becoming overwhelming. This incremental approach builds confidence and keeps the learning process exciting.
One strategy is to add new features to the original maze game. For instance, a child could add a "key" sprite that must be collected before the goal can be reached, introducing variables to track inventory. They could also add moving enemies, which teaches more advanced motion and cloning. The Scratch community is an excellent resource, as it showcases countless projects that incrementally increase in complexity and provide great inspiration for 'next-step' builds.
For those ready to start a completely new project, several options provide a natural progression from a simple maze game. Each of these introduces a new set of programming concepts while reinforcing what has already been learned.
- A Platformer Game: This type of game, similar to Super Mario, introduces the concept of gravity (a constant downward force) and jumping logic. The child will learn to create scripts that make their character fall unless it is touching a platform, a more complex form of collision detection.
- An Interactive Story: This project moves beyond simple animation to teach branching narratives. The creator uses
ask and waitblocks to get user input andif-then-elseblocks to change the story's direction based on the player's choices. - A Virtual Pet: A virtual pet project is an excellent way to learn about variables in a meaningful context. The child creates variables to track the pet's hunger, happiness, and energy, then programs buttons to perform actions (like feeding or playing) that change these variables over time.
- A "Pong" or "Breakout" Clone: These classic arcade games are perfect for mastering collision detection and understanding how to use
broadcastblocks to signal events, such as when a point is scored or a life is lost.
 Turning Ideas Into Builds - steps: 1. Plan Your Project (Sketch ideas, define goals), 2. Code in Stages (Build small, manageable parts), 3. Test & Debug (Find and fix glitches), 4. Refine & Share (Add details, get feedback).
How to keep a kid's Scratch project from getting abandoned?
One of the biggest challenges for parents is keeping a child's initial spark of interest in coding from fading. A project that starts with excitement can quickly become a source of frustration and get abandoned. The key to sustained engagement is providing the right structure, support, and motivation. Breaking a large project into smaller, manageable milestones helps a great deal. Celebrating the completion of each small part, like making a character move correctly, provides positive reinforcement and builds momentum.
Sharing creations with others is another powerful motivator. Connecting with the broader Scratch community to share projects and receive feedback can significantly boost a child's motivation by providing a real audience and peer support. When kids see others playing and enjoying their game, they feel a sense of pride and are more encouraged to continue building and improving it.
For many children, however, self-directed learning can only go so far. When they hit a difficult bug or a conceptual wall, having a mentor to provide guidance can make the difference between quitting and breaking through. This is where structured learning with an experienced instructor becomes invaluable. This personalized attention helps a child work through problems at their own pace. This is the approach Codeyoung uses with its students, connecting them with live, expert tutors.
Sustaining interest also requires high-quality instruction. At Codeyoung, we maintain a rigorous teacher hiring process with a 0.1% acceptance rate, ensuring our instructors not only have technical expertise but also excel in empathy and communication. Our proprietary CREATOR teaching methodology focuses on a step-by-step, project-based approach that keeps students engaged. For continuous learning, we provide students with the Noah AI platform for practice between sessions and offer recordings of every class for review, which is a key part of our Scratch coding classes for kids. This system of support helps prevent the frustration that often leads to abandoned projects.
Starting with a strong foundation is crucial. When a child understands the core principles of coding, they are better equipped to tackle more complex challenges independently. Quality private tutoring helps build these fundamentals effectively and does not need to be prohibitively expensive. By providing the right support structure, we can help children move past initial hurdles and develop a lasting passion for creating with code.
Starting with engaging Scratch projects like a maze game lays a strong foundation in coding fundamentals and problem-solving skills. By providing accessible project ideas, clear instructions, and a path for progression, parents and educators can help children build confidence and see programming as a creative tool. When a child's curiosity is paired with the right support system, whether through community engagement or personalized guidance, they are more likely to overcome challenges and continue to build. This ensures their initial excitement evolves into a durable interest in technology and design.
At Codeyoung, where we maintain an 80%+ course completion rate across our 1:1 live Zoom sessions, we have learned that recording every session so families can re-watch key moments is a powerful tool against project abandonment. When a child gets stuck or forgets how they solved a previous challenge, they can revisit their own recorded breakthrough rather than starting from scratch or waiting for the next lesson. This approach, combined with our CREATOR teaching framework, helps students build the habit of persistence. As noted by the Computer Science Teachers Association at csteachers.org, fostering computational thinking includes developing perseverance in problem-solving, and having a personal archive of their own learning journey gives children both the reference material and the confidence to push through obstacles independently.
Frequently Asked Questions
How long does it take a beginner to complete their first Scratch project?
Most beginners can complete a simple first project like a maze game or animated card in one to two hours, depending on their age and focus. Breaking the project into smaller steps across multiple sessions often works better for younger children, allowing them to absorb concepts without feeling overwhelmed. The key is celebrating each small milestone to maintain momentum and enthusiasm.
Can my child learn Scratch without any prior coding experience?
Absolutely, Scratch was specifically designed for children with no prior coding experience. The visual, block-based interface eliminates the need to memorize syntax, allowing kids to focus on learning fundamental programming concepts like loops, conditionals, and events through drag-and-drop actions. Many children as young as six successfully create their first interactive projects within their first few sessions.
What age is best to start Scratch coding projects?
Children typically start Scratch projects successfully between ages 6 and 8, though some begin earlier with parental support. Younger children (6-7) thrive with simpler projects like animating their name or creating an interactive card, while older kids (8+) can tackle more complex games with multiple levels and variables. The most important factor is the child's interest level rather than their exact age.
Should my child follow tutorials or create original projects from scratch?
Beginners benefit most from following one or two structured tutorials first to understand how Scratch works, then gradually adding their own creative modifications. Once they have completed a few guided projects and understand the basic blocks, they can transition to building original ideas with occasional reference to tutorials for specific features. This balanced approach builds both technical skills and creative confidence.
How do I know if my child is ready to move beyond beginner Scratch projects?
Your child is ready for intermediate projects when they can independently use variables, create multiple sprites that interact, and debug simple errors without constant help. Other signs include asking questions like "How do I make this happen?" rather than "What do I do next?" and expressing interest in adding features beyond the basic tutorial. At this stage, they are thinking like a programmer and ready for more complex challenges.
Is one-on-one instruction necessary for learning Scratch, or can my child learn independently?
No, it is not strictly necessary. Plenty of children make real progress in Scratch on their own using free tutorials and the project ideas above, because the block-based interface is forgiving and rewards experimentation. What 1:1 instruction adds is speed and momentum: a tutor picks the right next project, unblocks a stuck child in minutes instead of days, and keeps the difficulty matched to their level so they do not drift off. A good rule of thumb is to let curious, self-motivated kids explore independently first, then bring in personalized help when they plateau, lose interest, or are ready to move past beginner projects.
Can personalized Scratch coding instruction help beginners learn faster than self-directed learning?
Yes, personalized Scratch coding instruction unequivocally helps beginners learn faster and more effectively than purely self-directed learning. While self-directed exploration has its place, the tailored approach of personalized instruction significantly accelerates progress by helping parents strategically select engaging projects, like starting with an intuitive maze game, which offers immediate accomplishment and boosts confidence. This guidance extends to breaking down complex ideas into manageable, step-by-step tasks, and categorizing projects by type—be it games, animations, or art—to align with your child's specific interests and skill level. Crucially, personalized instruction provides the structured support and celebration of small achievements necessary to sustain a child's engagement, fostering a vital sense of ownership that prevents abandonment and ensures a lasting passion for coding.